
The dashboard is the first thing you see when you sign in, and it exists to answer one question: what needs doing today? Nothing on it asks you to type anything. It is all worked out from records you have already entered.
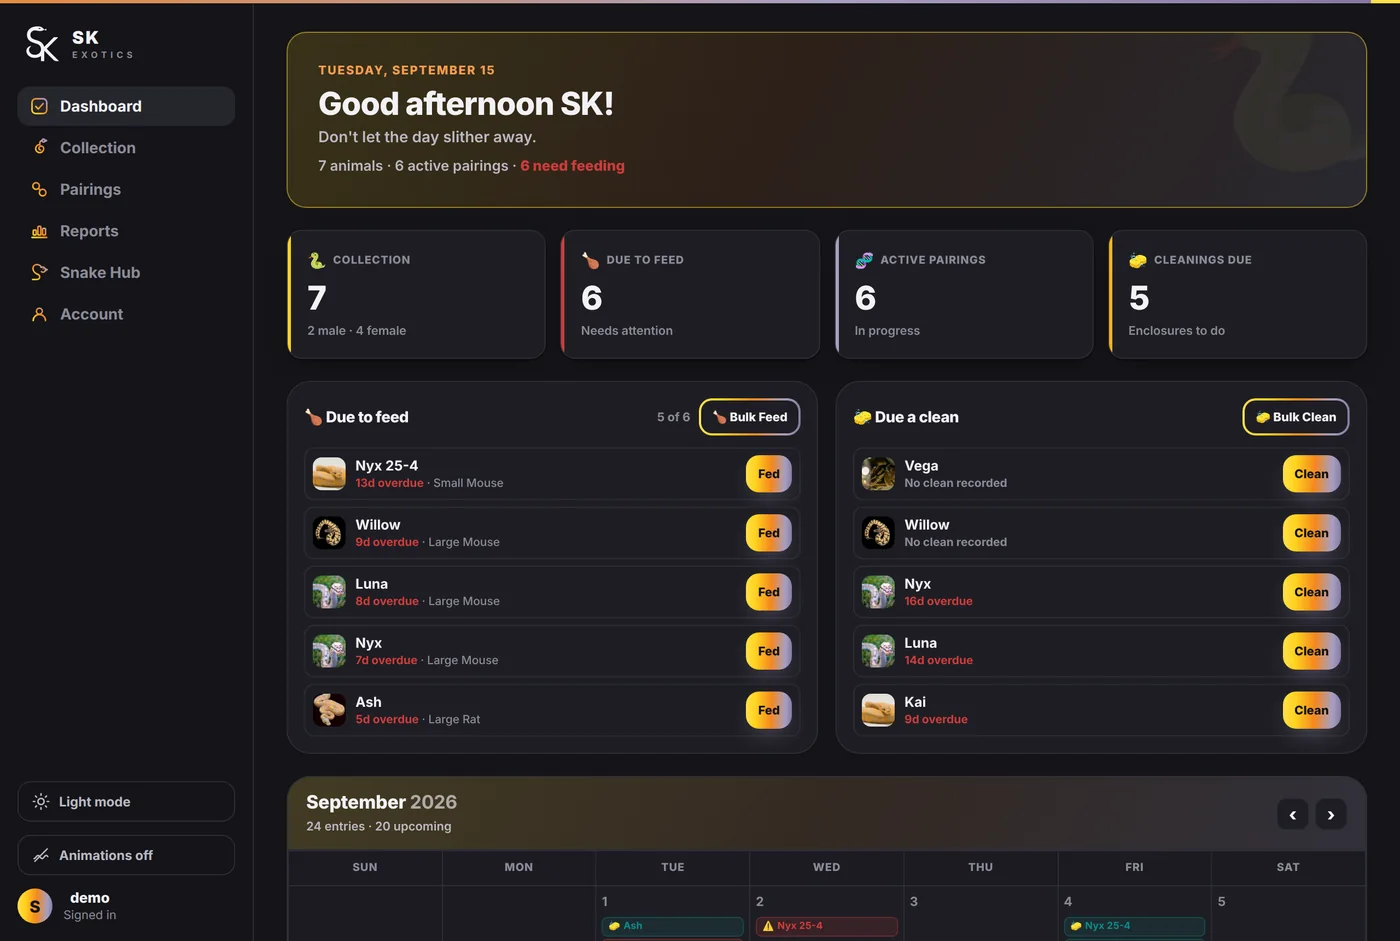
The four counters
Along the top sit four numbers. They are live, and they are the fastest health check you have.
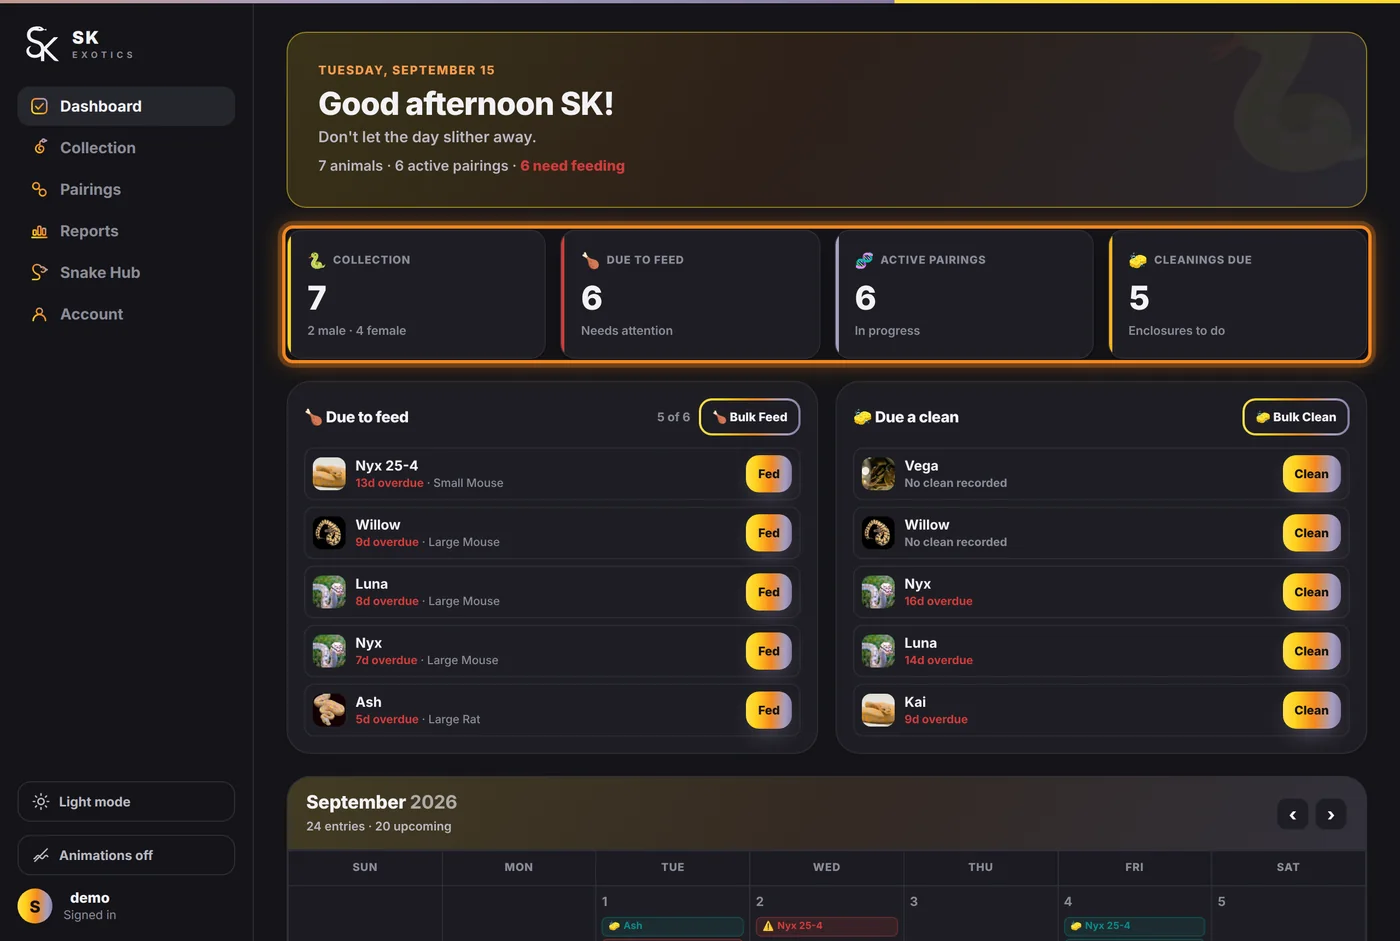
- Collection — how many animals you hold, split by sex underneath.
- Due to feed — animals whose next feed date has arrived or passed.
- Active pairings — pairings that have not yet finished or been closed.
- Cleanings due — enclosures waiting on a clean.
Due to feed, and Due a clean
The two lists below are the working part of the screen. Each row names the animal, shows how overdue it is, and — for feeding — the prey size you last used, so you know what to take out of the freezer before you walk to the rack.
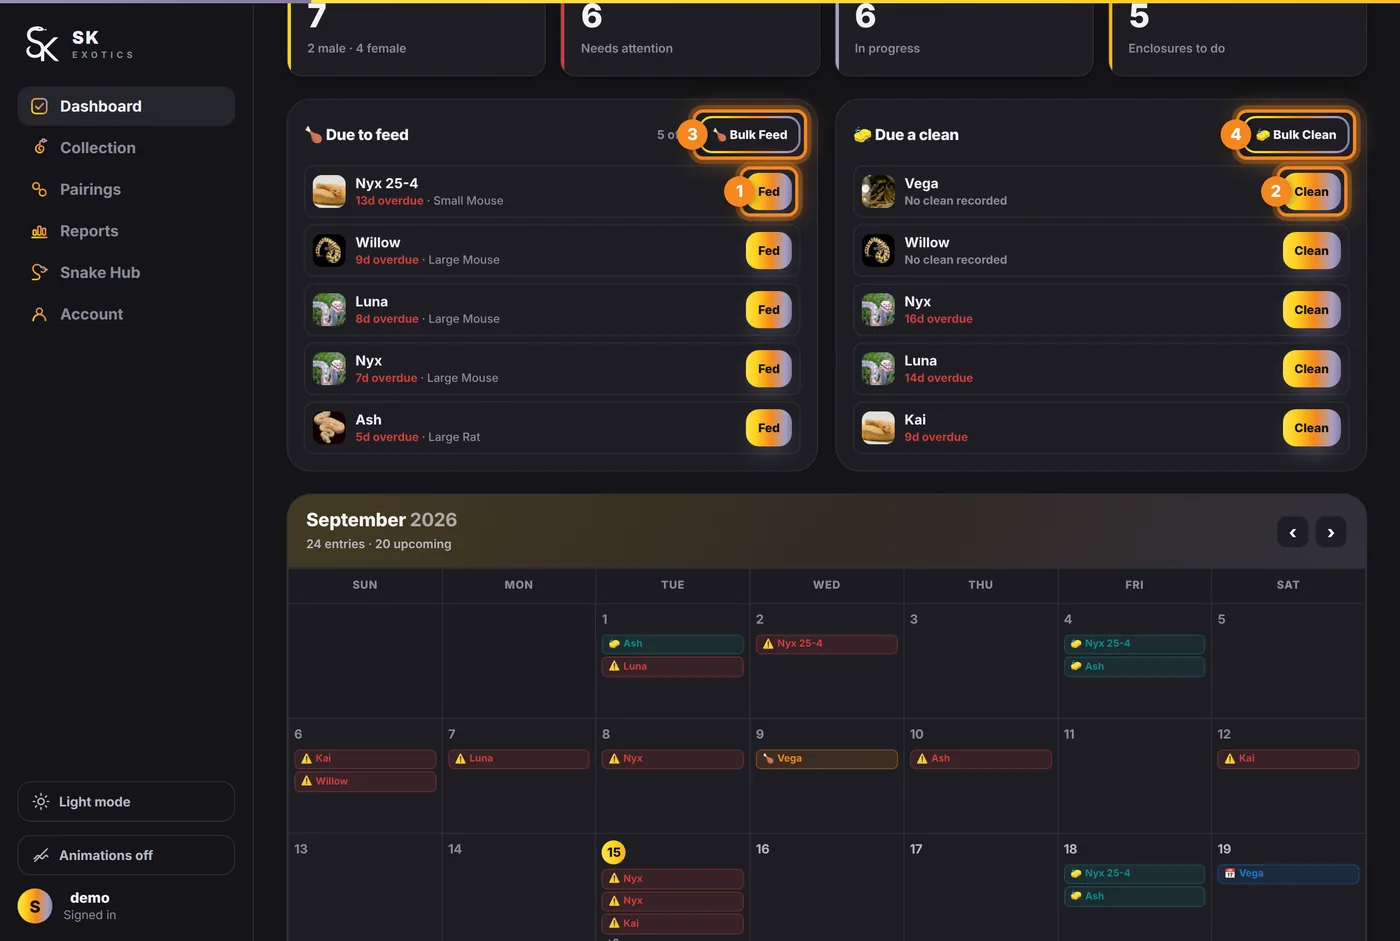
- 1. Fed — on a feeding row, logs that meal there and then. One tap, no form.
- 2. Clean — the same, on a cleaning row.
- 3. Bulk Feed — handles the whole feeding list at once, which is what most people want on a feed night.
- 4. Bulk Clean — the same for cleaning.
Red text means overdue, and by how long. "Due today" is not late — it is today's work.
The calendar
Scroll down and the month is laid out with everything on it: feeds, sheds, cleans, vet visits, and where each pairing has got to. The arrows at the top right move between months.
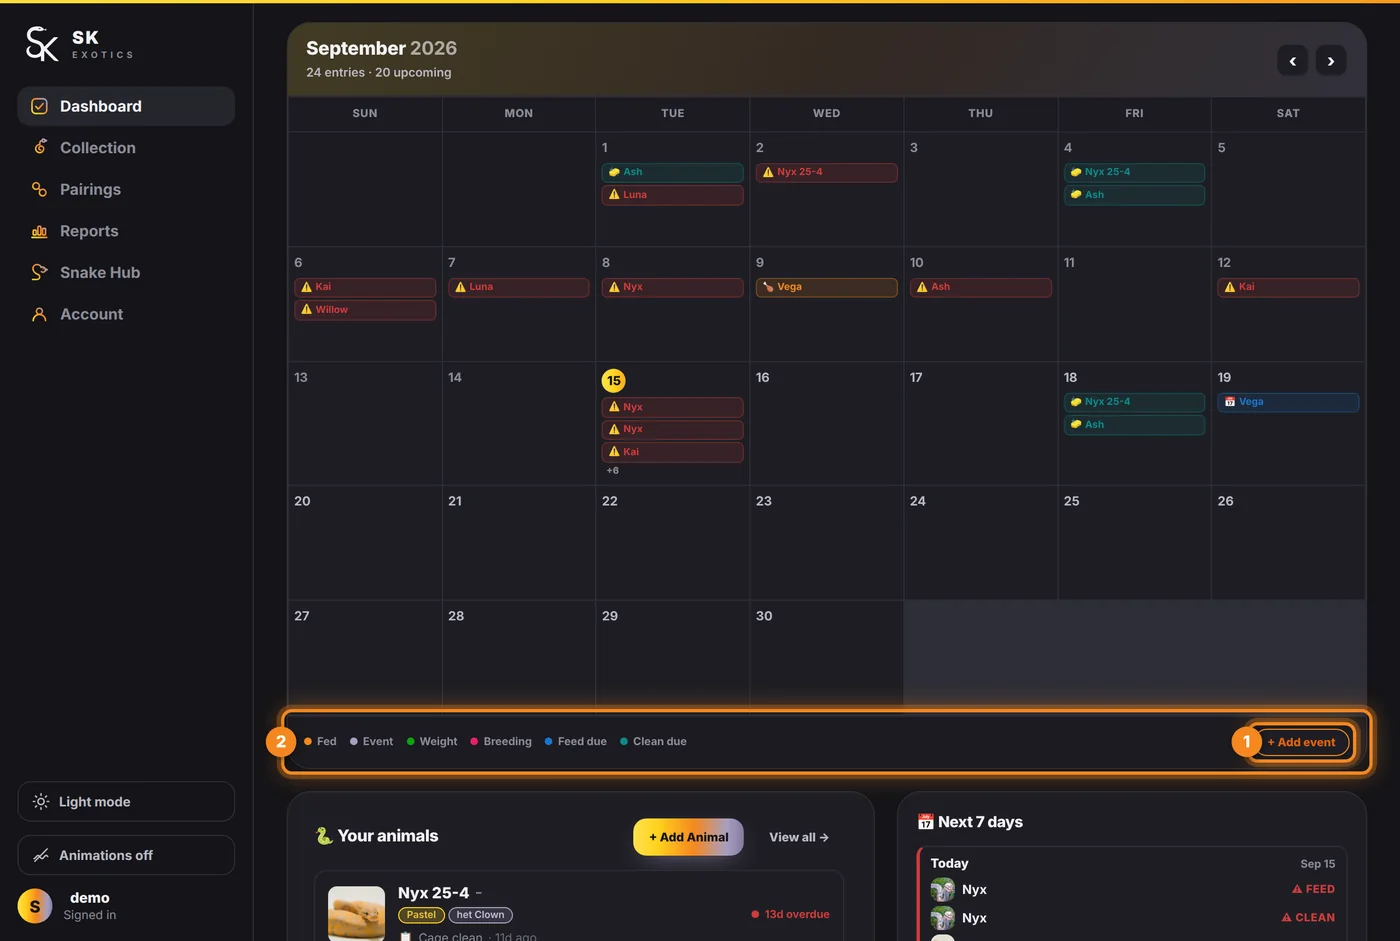
- 1. + Add event — puts something on the calendar by hand.
- 2. The key — says what each colour is: Fed, Event, Weight, Breeding, Feed due, Clean due. A day with more than three entries shows a + you can tap.
Two things worth knowing
- The dashboard only knows what you have logged. A quiet screen on a day you know is busy means a record has not gone in yet.
- Feeding intervals are learned from that animal's own history rather than a fixed rule, so the more you log, the better the due dates get.